Computational Coffee

This could be the most important picture in the history of coffee 😉, because it shows the range of roasted coffee seen across the planet, the frequency of each roast level encountered, and consequently what you need to do to deal with it.

Actual Range of Roasted Coffee Density and Frequency
Figure 1- Actual Range of Roasted Coffee Density and Frequency

Density.coffee is built on two facts.

  1. Over-extracted coffee is bitter, and under-extracted is sour. So no one boils their coffee endlessly in a percolator anymore because it always makes very bitter coffee.
  2. How easy, or how difficult it will be to extract the soluble compounds, depends on the roast level, and can be measured by the density.

Coffee Beans are not beans, they are seeds.

In fact, though beans are always seeds, seeds are not always beans. A bean is just one kind of seed. Specifically, it is a name for seeds of the family Fabaceae (also known as Leguminosae) of which the coffee plant is not a member; thus, coffee “beans” are not actually beans, and will be referred to as seeds hereon.

After a couple of years of running, density.coffee is approaching 10,000 visitors from all over the globe. Statistically analyzing the log of density entries reveals some amazing facts.

[if you don’t know how to measure coffee see How to Measure Roasted Coffee Density]

Density Range

The first thing the graph shows us is, 95% of the coffee densities fall between 0.345 and 0.495 g/ml, which is 150 0.1g steps from the darkest roasts to the lightest roasts, revealing the density range.

It can be a bit challenging to wrap your head around such small numbers, so if you multiply it by 100 it is easier to comprehend the weight difference of 100mls of coffee seeds in the volumetric cylinder ranging from 34.5 gms to 49.5 gms.

Looking at the bounds of this range, and how it affects coffee extraction. At the very darkly roasted end of the range at 0.345g/ml, the roasted seeds don’t weigh much at all, they have boiled off most of their water. They are now so porous and brittle, you don’t need a grinder, you can crush them with your fingertips! Therefore, the slightest bit of lukewarm water and the solubles come flooding out. You have to dial all your tools right back or you are bound to over-extract and make bitter coffee.

Conversely, at the very lightly roasted end of the range at 0.495g/ml, the roasted seeds weigh a lot more. They are rock-hard. Trying to grind those in a hand grinder is nigh on impossible. As a consequence, you need heaps of very hot water, and all your tools and tricks have to be used to the max to extract the good sugars. It’s quite likely you will under-extract and make very sour coffee.

Making Coffee with a Fixed Recipe

Most Baristas are using a Fixed recipe to extract coffee:

(SCA) Our research suggests that the average barista uses a 1:2 brew ratio when extracting espresso and uses weight for output measurement. The average shot of espresso starts with an 18–20 gram dose, has an output of 36.5 grams, and is extracted in 25–30 seconds, at 9 bars of pressure and 200°F, using pre-infusion, through an 18-gram basket. (source). This will be referred to as the Fixed recipe hereon.

My mission here is to show you why that Fixed recipe can’t work, quite often.

Now, I’m going to use a golfing analogy (quite a lot).

That density range is like a 150-yard golf range or a fairway.

Density range

In the game of golf, you’ve got your golf bag full of clubs of different sizes and capabilities, your big powerful drivers right down to your little putter. The first step is to examine the fairway and see how far away the hole is. The hole might be right in front of you, or it might be at the other end of the fairway 150 yards away, or the hole might be at any of the 150 yards in between. Next, you select the appropriate club to try and get your ball on the green, so you can finally use your little putter to chip it into the hole.

Density Frequency

Back to coffee extraction. The second thing the graph in Figure 1 shows, is the density frequency, in other words how often each Roast Level (or density) occurs. This could be viewed as the probability your coffee is going to be roasted where you expect it to be, or not, as the case may be.

Expected Density Frequency

Now I fully expected the frequency distribution of coffee densities, to be a bimodal distribution (a double-peaked normal distribution), and look something like this:

Expected Coffee Density frequency
Figure 2 Expected Coffee Density frequency

Typically, when you purchase bags of coffee they are often labeled as either “Espresso Roast” or “Filter Roast”.

This led me to believe:

  • there would be more espresso roast and slightly less filter roast.
  • I expected most espresso would be a mid-roast, and probably peak around 0.390 g/ml. Roasters would know most people are doing the Fixed recipe: 1:2 ratio, 18g dose, 36g yield, 93C, 25 sec shot – you know the drill, and everything would kind of work most of the time.
  • I thought filter roast would peak a little higher at 0.410g/ml so the Fixed filter recipe of 1:16 ratio 14g dose, 224g yield, 93c 4:00 minute V60 filter coffee extraction would kind of work most of the time.

Actual Density Frequency

However, that is NOT what that graph in Figure 1 reveals. It’s not a bimodal distribution, and the distribution is much flatter than expected. The probability is, you are going to get coffees roasted right across the range, and well outside of the roast level you have pre-determined to expect. If you think you are getting a mid-roast that will play nice with your fixed routine 1:2 ratio, the reality is 65% of the time you are going to be way off. That’s more than half. The odds aren’t good, you are on a losing hand.

Impact of Density Frequency on Fixed Recipes

If you are making espresso, that fixed recipe of 1:2 ratio, 18g dose, 36g yield, 93C, the 25-sec shot is going to put you in the rough at 0.390g/ml 65% of the time. You are going to be miles off, super bitter, or super sour. Worse, by fixing all your available tools, you are limiting yourself to only using your little putter (the grind adjustments) to try and move toward the hole, which is an impossible thing to do.

Do you think Tiger Woods plays golf like this?

You are not examining your coffee

That he never looks at the fairway, puts a blindfold on, and smacks the ball halfway down the range, every time, no matter what, and then only uses his little putter to finish the job. NO.

Making coffee using density

You’ve got a great set of tools, but you are not using them, because most of them you have rusted solid into pre-fixed positions. I’m going to try and convince you to change that, help you start using all your tools, to help you get yourself on the green, in the ballpark, within putting distance of the hole.

You’ve got a great set of tools, but you are not using them

Coffee making Espresso Tools:

Coffee Ratio

RATIO

This is your most powerful tool. In golfing terms, it would be your no.1 wood, your big driver.

Because of water’s polarity and ability to form hydrogen bonds, water makes an excellent solvent, meaning that it can dissolve many different kinds of molecules.

The more solvent you use the more you extract.

This is the most misused tool. Some people randomly choose to make a ristretto, or a lungo, with absolutely no relation to what they need to achieve. A light roasted coffee done as ristretto is going to be very sour. A darkly roasted coffee done as lungo is going to be very bitter.

Looking at the bounds: you will need to use hardly any water at 0.345g/ml, just a 1:1 ratio or you will over-extract.

At 0.495g/ml, you are going to need masses of solvent water, a 1:5 ratio to have any hope of avoiding under-extracted sour.

Everything in between can be calculated, by density.coffee. It’s all relative to density, and degree of extraction.

Coffee dose

DOSE

Your next most powerful tool, and likewise sadly misused. Changing the dose is to help you achieve the required ratio, it is not some random strength thing.

Looking at the bounds: at 345g/ml, using the recommended 1:1 ratio, because you have a tiny amount of water, you are going to get a tiny yield. By maximizing your dose to a huge 25g, you get more of a much better-tasting yield.

At 0.495g/ml, using the recommended 1:5 ratio, you are going to have a great deal of difficulty achieving it unless you minimize your dose. At 14g you will be able to achieve a sweet 70g yield, and that is about the max.

Everything in between can be calculated, by density.coffee. It’s all relative to density, and degree of extraction.

Coffee portafilter baskets

BASKETS

A criminally under-utilized tool.

Your basket should be no more than +/- 1g of your dose.

VST Precision baskets are 15g, 18g, 20g, 22g, and 25g. You need a full set.

The number of holes and the diameter and distribution of the holes are different for each sized basket, to maintain a consistent flow rate with different doses.

Now that you are using your ratios and doses correctly, you are going to need a full set of baskets. Compared to the cost of your machine, they are a cheap good investment.

Get the ridge-less versions.

Looking at the bounds: at 0.345g/ml density, you will be using the 25g basket with your 25g dose.

At 0.495g/ml density, you will be putting your 14g dose in the 15g basket. If you use a bigger basket, the hole sizes are larger, it won’t generate enough pressure and it won’t get enough contact time.

Everything in between can be calculated, by density.coffee. It’s all relative to density, and degree of extraction.

Coffee yield

YEILD

Mr. Hoffman et al might hate Ratios, but they are useful. Your yield is entirely set by your given ratio and dose.

Looking at the bounds: at 0.345g/ml density, using the recommended 1:1 ratio and 25g dose, you will stop at a yield of 25g.

At 0.495g/ml density, using the recommended 1:5 ratio and 14g dose, you will stop at a yield of 70g.

Everything in between can be calculated, by density.coffee. It’s all relative to density, degree of extraction.

Coffee bar (pressure)

BAR

Pressure is used to speed up extraction, it is the whole point of espresso being 30 seconds versus a 4-minute French Press.

Looking at the bounds: at 0.345g/ml density, the seeds are soft and porous, easing off on the pressure to 6 bar.

At 0.495g/ml density, the seeds are hard, so use more force to extract more, 9 bar.

Everything in between can be calculated, by density.coffee. It’s all relative to density, degree of extraction.

Coffee extraction temperature

TEMP

Higher temperatures tend to flatter lighter roasted or more acidic coffees, by bringing out the sweetness; while lower temperatures can reduce the roasted, ashy flavors that might otherwise be found in darker roasts. (source).

Looking at the bounds: at 0.345g/ml density, lower the temperature to 85 °C.

At 0.495g/ml density, increase the temperature to 95 °C.

Everything in between can be calculated, by density.coffee. It’s all relative to density, degree of extraction.

Coffee extraction time

TIME

Looking at the bounds: at 0.345g/ml density, reducing the shot time to as low as 20 seconds helps avoid over-extraction.

At 0.495g/ml density, increasing the shot time increases the level of extraction, so for a very light roast going up to 40 seconds helps.

Everything in between can be calculated, by density.coffee. It’s all relative to density, degree of extraction.

Coffee milk

MILK

You don’t have to use milk, it is your choice, but milk and coffee are a marriage made in heaven. When milk is steamed to 60 Celsius it reaches its optimum sweetness. Aerate it just enough to produce a thick paint texture.

Looking at the bounds: at 0.345g/ml density, lots of milk helps sweeten a very dark roast.

At 0.495g/ml density, the coffee is at a high ratio and becomes lighter, tea-like. Reducing the volume of milk helps prevent washing it out.

Everything in between can be calculated, by density.coffee. It’s all relative to density, degree of extraction.

CUP SIZE

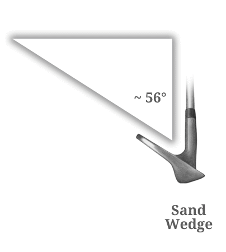
Another secret weapon in your toolkit, much like a wedge to help you out of a hole.

150mlAt 0.495g/ml density, the coffee has less dose and a high ratio, use hardly any milk, in fact, replace some of the milk with bypass hot water. A small cup is going to help strength.
170 ml 
190 ml 
Medium 250ml coffee cup
250 ml
 
280mlAt 0.345g/ml density, a lot of sweet milk really helps make that dark roast, a  big cup helps.
Coffee bypass water

BYPASS WATER

Looking at the bounds: at 0.495g/ml density, very lightly roasted coffee has required a low dose and a high ratio of water (as above). If you add a lot of milk, as most people do with flat whites, lattes, and cappuccinos, then the light delicate flavor notes, fruits, acidity, and aromas, of a lightly roasted coffee can easily be overwhelmed. By replacing a proportion of the milk with some hot water you will bring out the full range of flavours from your coffee seeds. This hot water has bypassed the coffee extraction bed (to avoid over-extraction bitterness) – hence the term bypass. Commonly bypass is used with Americanos and long blacks. But with an increasing trend to lighter roasted coffee, bypass should start to be included with milk versions as well. This is a secret tool to get you out of a sand trap, like a wedge.

At 0.345g/ml density, the other end of the roast/density range, a very darky roasted seed can be very ashy and burnt tasting. A large volume of milk helps makes a more palatable drink; no bypass hot water is required.

Everything in between can be calculated, by density.coffee. It’s all relative to density, degree of extraction.

Coffee grind setting

GRIND

Grind adjustments are hopefully step-less and in the microns. They are like your little putter. You should not be expecting to make big adjustments with your grinder. The reason for this is you are constrained by physics. Grind too fine, your basket holes will plug up, and the shot will choke. Grind too coarse, and there is not enough puck resistance, water will run through too fast.  If you are changing all the other settings appropriately relative to density, then you will find you have to change your grinder much less wildly, and extractions will work much better.

You can measure your grind setting with a brewler. Measurements are good.

Looking at the bounds: at 0.345g/ml density, you will be grinding coarser to reduce extraction, expect ~400 microns.

At 0.495g/ml density, you will be grinder finer to increase extraction, actually, 180 microns is ridiculously fine.

Everything in between can be calculated, by density.coffee. It’s all relative to density, degree of extraction.

Taste

Density.coffee does not give you the answer, it gives you a better starting point. You still need to taste the coffee and assess if you have avoided sour under-extraction, and avoided bitter over-extraction. The coffee may not have inherent sweetness, but avoiding these extremes can be achieved.

Taste the coffee before you add any milk because it masks flaws. Try dipping a teaspoon in, just coat it, you don’t need to fill it, then suck it. Practice by making intentionally massively under-extracted and over-extracted coffee to learn the tastes.

Note that it is really hard to taste hot coffee, and the taste will alter as it cools. 

Coffee making Filter Tools

The same principles apply to all coffee extraction methods, just the tool sets and the bounds differ.

Coffee Ratio

RATIO

Again, the ratio is your most powerful tool. In golfing terms, it would be your no.1 wood, use it carefully.

Because of water’s polarity and ability to form hydrogen bonds, water makes an excellent solvent, meaning that it can dissolve many different kinds of molecules.

The more solvent you use the more you extract.

Looking at the bounds: you will need to use less water at 0.345g/ml, just a 1:13 ratio or you will over-extract.

At 0.495g/ml you are going to need masses of solvent water, a 1:20 ratio to avoid under-extracted sour.

Everything in between can be calculated, by density.coffee. It’s all relative to density, degree of extraction.

Coffee dose

DOSE

Looking at the bounds: at 345g/ml, using the recommended of 1:13 ratio, because you have a smaller amount of water, increasing the dose to 16g helps.

At 0.495g/ml, using the recommended 1:20 ratio, reducing the dose to 10g helps.

Everything in between can be calculated, by density.coffee. It’s all relative to density, degree of extraction.

Coffee extraction temperature

TEMPERATURE

Higher temperatures tend to flatter lighter roasted or more acidic coffees, by bringing out the sweetness; while lower temperatures can reduce the roasted, ashy flavors that might otherwise be found in darker roasts. (source).

Filter coffee has a much longer contact time than espresso, and the temperature drops over this time, so the range is smaller, 95 Celsius for lightly roasted very dense seeds, down to 90 Celsius for darkly roasted porous seeds.

Looking at the bounds: at 0.345g/ml density, lower the temperature to 90 °C.

At 0.495g/ml density, increase the temperature to 95 °C.

Everything in between can be calculated, by density.coffee. It’s all relative to density, degree of extraction.

Coffee extraction time

WATER

With a filter coffee, you are making the same fixed cup size. The only change is due to different dose sizes retaining slightly different amounts of water.

Coffee milk

TIME

Lighter roasts need more contact time to extract, darker roasts need less.

At 0.345g/ml density, lower the time to 2:30.

At 0.495g/ml density, increase the time to 7:00.

Everything in between can be calculated, by density.coffee. It’s all relative to density, degree of extraction.

Coffee grind setting

GRIND SETTING

Grind adjustments are hopefully step-less and in the microns. They are like your little putter. You should not be expecting to make big adjustments with your grinder. The reason for this is you are constrained by physics. Grind too fine, your filter will plug up, and the shot will choke. If the Grind is too coarse, and there is not enough filter resistance, water will run through too fast.  If you are changing all the other settings appropriately relative to density, then you will find you have to change your grinder much less wildly, and extractions will work much better.

You can measure your grind setting with a brewler. Measurements are good.

At 0.345g/ml density, you will be grinding coarser to reduce extraction, expect ~1200 microns.

At 0.495g/ml density, you will be grinder finer to increase extraction, actually, 700 microns is ridiculously fine.

Everything in between can be calculated, by density.coffee. It’s all relative to density, degree of extraction.

Making coffee using COMPUTATIONAL COFFEE

Computational Coffee refers to the use of data analysis, mathematical modelling and computational simulations to understand coffee extraction systems and relationships. An intersection of computer science, biology, and big data, the field also has foundations in applied mathematics, and chemistry.

The website density.coffee is Computational Coffee, it does all the calculations for you. It takes your measured density reading and calculates the relative setting for each of the ‘tools’ (ratio, dose, temp, grind, bar, yield, time, cups size, bypass water, milk, grind) for each extraction method (espresso, Hario Switch/Clever dripper, Aeropress, filter…)

This gives you a better ‘starting position’ for coffee extraction, to avoid bitter or sour coffee.

ONLY CHANGE ONE THING AT A TIME = WRONG!

Because Density.Coffee (Computational Coffee) changes all the settings in concert relative to the density, this gives you One Tool to Rule them All = Density. If your resultant coffee is too bitter, you need to extract less. Subtracting 0.2 from the density shifts all the settings in concert. e.g. change 0.375 to 0.355 g/ml. It makes a very appreciable step in the right direction.

Conversely, if your resultant coffee is too sour you need to extract more. Adding 0.02 to the density will increase extraction.

The most powerful tool of all +- 0.02 g/ml

Sure, if you are in the ballpark, and only need a minor adjustment, a grinder nudge may do the job.

SEED SIZES

Really small seeds – yeah, we are looking at you Ethiopian Landraces – are difficult to roast. They have a tendency to get overcooked quickly. You will sometimes find extracting less by subtracting 0.2 will be required with very small seeds.

Very large seeds – the likes of Pacamara, and Maragogipe – are also difficult to roast. They have a tendency not to get cooked to the same level all the way through. You will sometimes find extracting more by adding 0.2 will be required with very large seeds.

MEASURE FIRST

You have heard the expression Measure Twice, Cut Once.

You don’t see builders cutting wood first, then trying to nail it up, and going “oh that didn’t work”, and blindly trying again:

Measure Twice, Cut Once

No, they use a simple tool to take a measurement first.

A simple tool for measuring before cutting

You don’t have to make coffee like this:


Stop trying to make coffee without measuring density

You have simple cheap tools to help you measure first before you attempt to extract coffee, to help you find a better starting point from which you can avoid bitter and sour coffee much more successfully.

Light Roast Example

Let’s do a couple of real-world examples to compare the density.coffee recipe to a Fixed recipe.

The first coffee is Sumava Ruva Costa Rica Black Honey Gesha roasted by Ozone, with a measured density of 0.421 g/ml. This coffee is roasted slightly on the light side, not massively beyond mid-roast, but certainly in the upper 40% most likely of roast levels to be encountered. Already we can see why the fixed recipe is running into trouble. It’s going to under-extract, undershoot the hole, ending up sour.

Light roast comparison density.coffee vs fixed recipe
 
Density.coffee
Fixed
Result

Temp

90 c

93.5

Fixed is too hot and will extract some off notes.

Ratio

3.1

2

This will cause a real problem, Fixed is not going to extract enough, which will result in a sour coffee

Dose

19

18

Not a hugely significant difference, but using less dose is not going to help if you are only using a 1:2 ratio

Yield

59

36

This is the real problem; insufficient water is going to under extract making it sour

Time

31

25

With less contact time, that’s also going to under-extract, increasing sourness.

Grind

283 microns

150 microns

With a Fixed recipe, the only tool you use is grind size. In an attempt to extract more you will have to grind incredibly fine, which will choke your basket holes and ultimately fail.

Result

Beautifully sweet cup

Sour


Many would argue 0.421 g/ml is too light a roast for an espresso, and it would work better as a filter coffee. The only reason for this is not using all your espresso tools and limiting yourself to grind adjustments only. Espresso is perfectly capable as an extraction method for the complete density range.

Dark Roast Example

The second example of coffee is Los Angeles El Salvador Natural Pacamara roasted by Cypher Roastery, with a measured density of 0.355 g/ml. Not the darkest of roasts but well into the dark side. This was an expensive COE #5 coffee, so you would want to make the best of it you can.

The Fixed recipe is going to over-extract this, overshooting the hole, and ending up bitter.

Dark roast extraction comparison density.coffee vs fixed recipe
 
Density.coffee
Fixed
Result

Temp

85 c

93.5

Fixed is way too hot and will extract bitterness.

Ratio

1.3

2

This will cause a problem, Fixed is using more solvent water, which will over-extract, resulting in a bitter coffee

Dose

24

18

With a 1:1.3 ratio, you need to increase that dose. The fixed 18g dose is just too small.

Yield

31

36

This might not look significant, but a 31g yield from a 24g dose is very different from a 36g yield from an 18g dose.

The Fixed recipe is extracting more from a lower dose increasing bitterness.

Time

22

25

Fixed has more contact time, increasing bitterness.

Grind

390 microns

500 microns

With a Fixed recipe, the only tool you are changing is grind size. In an attempt to extract less, you will have to grind very coarse, which will provide insufficient resistance in your basket (particularly with lower doses), and ultimately fail with water just pouring through.

Result

Beautifully sweet cup

Bitter


By measuring the density before you start, and using density.coffee you are getting a much better starting position from which any adjustment will be minor and achievable. If you keep using the fixed recipe you are doomed to very poor results quite often.

Trying to use a Fixed recipe for all coffee densities is very limiting, and destined for failure a lot of the time.

Meat Analogy

Imagine if you tried to cook meat the same way you are making coffee, using one fixed recipe for all meat.

If you had a beautiful tender eye fillet steak, a suitable recipe might be 2 mins on each side at high temperature. But if you have a tough old piece of brisket, is that going to be a good result – no! You need a long slow 4 hrs at a low heat to achieve a tender pull-apart result. When cooking meat you accept you have to use an appropriate recipe for the piece of meat you have.

It’s high time people woke up to the same principle with coffee, you need to measure the density of the coffee to determine an appropriate extraction recipe.

WINNING AEROPRESS RECIPIES

World Aeropress Championship: Winning Recipes of the Last 5 Years! – JayArr Coffee

This is the weirdest thing, any of these recipes could be hideously sour, or terrifically bitter, depending on what density you faced.

Recipes on their own, without knowing the density, are useless.

LOOK AT THE PACKET

I’m afraid that doesn’t really work. The label can be misleading. Even when they are simply labeled Filter or Espresso Roast, it might still not be what you expect. Many don’t put anything, which is very sensible really.

Coffee packet labels can be misleading

LOOK AT THE BEAN

Can’t you just tell the roast level by looking at the color of the bean? I’m afraid not, colour is not a good indicator. If you cook a roast at a really high temp, it might be black on the outside, but still tough on the inside. Coffee cooked high and fast will be dark, but still hold a lot of water, be dense, and difficult to extract. A piece of meat cooked long and low is not going to be black on the outside, but it’s going to be pull-apart tender. Coffee roasted long and low won’t be dark, but it will have lost most of the moisture, be brittle, porous, and extract really easily. Color is not the best tool to use. Measuring density is much better.

CONCLUSION

It blows my mind how everyone is trying to extract coffee without first measuring how hard it’s going to be, and then not using the full range of all their tools.

Exploding head

PS, don’t try and use the chart under the graph to get your settings, it is a crude approximation to illustrate the concept. Use the website density.coffee, it’s much more accurate.

Appendix

What is extraction?

Cells

A single coffee seed contains about 4,500,000 cells, containing around 2,000 soluble compounds (substances that can be dissolved by water).

Solubles

Only 30% of a coffee seed is soluble. The other 70% of the seed is made of insoluble fibers and carbohydrates that create the seed’s structure.

About 20% of the seed contains good solubles and the other 10% are bad and taste awful. To brew the best cup of coffee we have to try and release the good solubles while leaving the bad ones locked up in the cells.

Tools

Luckily the bad solubles move slower and take longer to dissolve than the good solubles, so we can use all our tools to control the extraction.

  • The more solvent water you use, the more you extract.
  • longer water is in a cell, the more solubles are extracted.
  • The higher the temperature, the more you extract.
  • more contact time, the more you extract.
  • the finer you grind, the more you extract.

Soluble categories

The soluble compounds are of different shapes and sizes but fit into 4 main categories. Being different sizes they extract at different rates.

Acids & Caffeine.

Easiest to dissolve.

Lipids & Fats

Lipids are the natural fats and oils found in coffee seeds. They aren’t technically soluble in water but water can still release them from the coffee cell as an emulsion.

Brewing methods that use metal filters like French Press and espresso allow lipids to pass through into the cup, producing the mouthfeel those methods are known for.

The pores in paper filters are so small that they prevent most lipids from passing through. Drip brewing methods like pour-over will only contain 1/10th the lipid content compared to methods that use a metal filter.

Melanoidines

When coffee is roasted, the Malliard reaction produces melanoidin’s that are responsible for the browning color of coffee, both in seed and liquid form.

Carbohydrates & Fiber

Carbohydrates make up 50% of a dry coffee seed’s total mass yet only some of the carbohydrates are soluble. Their main role is to add sweetness and earthy flavors.

Espresso also contains 1.5 grams of soluble fiber per cup. 3 coffees a day could provide 20% of your recommended daily intake of soluble fiber!

See how big the sugars are, if you under extract you get all those little acids and not enough of the big sugars.

But you don’t want to over-extract and go all bitter.

Note, the balls are used as a representation of the solubles and are not drawn to scale.

Water can only extract solubles from cells it can touch. Grinding the coffee seed increases the number of cells water can access.

Grind size

For context, the thickness of one of the hairs on your head is 50 – 70 microns.

  • Espresso grind size of 200 microns, you get about 70,000 particles per seed, 64 cells per particle.
  • Filter grind size of 900 microns, you get about 695 particles per seed, 6500 cells per particle.
  • French Press grind size 1500 microns, you get about 62 particles per seed, 72000 cells per particle.

Grind too fine and the basket holes clog, too coarse and the puck resistance is insufficient. Grind changes are your worst tool, and should be your last resort, change everything else first.

Roasting

Cell structure

A green coffee seed is small dense and very hard. It is one of the hardest substances in the plant kingdom.

When coffee is roasted, the increased temperature and transformation of water into gas create high levels of pressure inside the seeds. These conditions change the structure of the cell walls from rigid to rubbery, creating a physical change in the coffee. This happens because of the presence of polysaccharides (bonded sugar molecules).

Water loss

The internal matter pushes out towards the cell walls, leaving a gas-filled void in the center. This means that the seeds expand in volume as they decline in mass. Much of the gas build-up is carbon dioxide that will be released after the roast.

Water makes up around 10–12% of processed and dried green seeds, but roasting reduces this to around 2.5%. As well as water that is already present in the green seeds, additional water is created by chemical reactions. However, this is vaporized during roasting, physically changing the coffee.

The loss of moisture and the transformation of some dry matter into gases is why seeds have a reduced overall mass after roasting. On average, seeds lose 12–20% of their weight.

Porosity

Roasting increases porosity, making the seeds less dense and much more soluble.

The longer the roast, the more pronounced the structural transformations. Seed density decreases continuously, more gases are developed as time passes.

Maillard reaction

First crack

When you see the coffee seeds start to turn brown, the Maillard reaction has started. This happens at around 150°C/302°F. During the Maillard reaction, gases including carbon dioxide, water vapor, and some volatile compounds are created. The internal pressure increases enough to break the cell walls of the seeds, making a pop. This event is known as first crack.

Development

After first crack, the roast changes from an endothermic reaction (the seeds absorb heat from the drum) to an exothermic one (the seeds release heat). During this stage, the physical transformations continue – seeds increase in porosity, oils migrate to the walls of the cell, and the color darkens.

The time after first crack is sometimes referred to the development time. Things happen quickly! The coffee changes in appearance and flavour most quickly at this point. Literally 30 seconds can produce a different tasting cup of coffee. We carefully monitor how long and at what temperature the coffees are being roasted at here, all with the goal of getting the best flavour from the seeds. How much development time to apply to a roast becomes quite personal. Everyone likes a different style of coffee and it’s usually after 1st crack that most people make their adjustments to how a coffee tastes. Longer roasts, shorter roasts, darker roasts, lighter roasts, and combinations of them all.

Second crack

If the roast continues long enough, coffee will go through a second crack. This is slightly softer sounding than 1st crack and it’s usually when oils will begin to migrate from the inside of the seed to the outside. The cellular matrix actually fractures here, allowing oils to migrate outward.

Density range

A very lightly roasted coffee seed remains very hard, dense and comparatively heavy. If you have every tried to hand grind lightly roasted coffee you will know how hard it is. You can barely turn the crank, its like grinding rocks. It is very difficult to extract enough without the coffee being sour and under extracted. All your tools and parameters need to be dialled up to the max to get to those sugars.

On the other hand, a very darkly roasted coffee seed has become very brittle, you can easily crush it with your fingertips. It is very easy to over extract and end up with bitter coffee, you need all your tools dialled right down.

Acknowledgements

https://handground.com/grind/an-intuitive-guide-to-coffee-solubles-extraction-and-tds

Physical changes coffee beans experience during roasting – Perfect Daily Grind

The Stages of Coffee Roasting – IKAWA Coffee

Craiyon, formerly DALL-E mini

5 thoughts on “Computational Coffee”

  1. Pingback: Why measure roasted coffee density - Make better coffee by measuring the density

  2. This is a really interesting approach to give a dialing in starting point. Significantly better than fixed recipe approaches.

    It does raise a question in my mind. Without knowing the initial density of the seeds, how can knowing the final density approximate the roast level? Surely the error margin is large?

    For example, a major influence on density is that seeds grown at altitude are generally much denser that those grown in the lowlands. a minor influence is that seeds growing nearer the trunk of the bush are generally more dense than those at the end of branch.

    Without knowing the initial seed density (at least for key equation reference values), aren’t the rest of the generated roast values super broad for calculated vs actual roast level?

    Again, I don’t know how much practical difference this inaccuracy makes if one still ends up with tasty coffee, but surely it can lead to notable variability in extraction optimisation? (Again, not withstanding that even so this is a patently significantly superior starting recipe than a generic fixed recipe.)

    1. Hi Ben,

      Great question.

      The correlation between density and roast level is very high.
      To even the casual observer, get a very darkly roasted bean and you can easily break it with your fingers, the bean is not very dense.
      With a very lightly roasted bean, it is impossible to break with your fingers, even a hammer has difficulty, the bean is very dense.

      But, we are not actually trying to measure roast level with the density.
      What is being determined is %DensityRange, or where does your coffee fall within the range.

      Over 4000 bags of roasted coffee have had their density measured (globally). 99.7% fall between the upper and lower bounds of a density range.
      See https://density.coffee/blog/computational-coffee/

      It is a bit like weather prediction. Using historical data collection to help model future outcomes.

      The model evolves as more data is collected but the changes get smaller over time.

      4000 samples gives a reasonably good confidence level.

      The SCA Standards for each extraction parameter are amortised over the density range. For example espresso ratio:

      1:1 Ristretto (extract the least)
      1:2 Normale
      1:3 Lungo
      1:4 Lungo allongé (extract the most)

      Any individual ratio can be expressed as a %EspressoRatio within this 1-4 range.

      A mathematical equation solves problem of what is the %EspressoRatio that equals %MeasuredDensity.

      So depending on your measured density you might end up with an espresso ratio of 1.8, or maybe 2.7

      The same calculation principle is used for each parameter using SCA standards.

      Maths generates recipes to cover the density range, from extract the least to extract the most.

      Looking at the frequency distribution of the 4000 samples, the number that could be successfully extracted with the fixed recipe 1:2 ratio and grind size adjustments, it is 20%. A 1 chance in 5 of getting it right first time.

      Whereas by using the recipe selected by measuring density against the %DensityRange, 70% of the time, or 3.5 chances in 5 of getting extraction right first time. Much better odds for the starting extraction.

      But you are correct in some respects, the margin of error is still large. 30% of the time adjustment will be required.

      Green bean density is an input factor if you are a roaster. But no matter what the original green bean density was, once it has been roasted, the result will fall somewhere within the roasted bean density range.

      Settled density is affected by lots of factors, especially seed size and packing.

      It’s not expected that one density measurement could possibly give you a 100% accurate result, every time.

      So a good adjustment mechanism is also required.

      Grind adjustments are constrained by physics. Grind too fine and your puck chokes. Grind too coarse and their is insufficient puck pressure.
      It is not possible by grind adjustment alone to cover extraction requirements for the entire density range from the fixed recipe.

      But the mathematical model has already calculated recipes more suited to achieving extractions right across the density range.

      Moving 20 x 0.1g density steps in either direction, significantly alters the extraction, because it is changing all the extraction parameters in concert.
      8 jumps covers the entire range.

      The direction you need to move is determined by taste. If its sour, it is under extracted, use the Extract More button that adds 20 to the entered density, and gives you the new recipe.
      If its bitter, it is over extracted, use the Extract Less button, subtracting 20.

      Measuring the density 70% of the time gets it right first time, but it also gets you a closer starting position, so 95% of the time a single adjustment is all that is required.
      Very rarely, two adjustments are required.
      Even more rarely, you may just be faced with a coffee defect or roast defect that can’t be fixed by extraction.

      You don’t actually have to measure the density. You could use the default (median) recipe, and then use the Extract More/Less jumps to achieve the end result.
      But 80% of the time the starting recipe would not be correct, and it may take more adjustment moves to reach the required extraction.

      Measuring density and mathematical modelling to improve your odds (both stating position and adjustment mechanism), is easily going to out perform assuming everything is always the same.

      I hope that answers you question.

      Regards, Richard Mayston

Leave a Comment

Your email address will not be published. Required fields are marked *

Print This Post Print This Post